(In a similar vein to some “Yours Truly, Johnny Dollar” episodes, this post could have a few alternate titles: “How to Install oysttyer on Mac.” Or “oysttyer Means Pearls of Wisdom for Twitter.” Or “Forget Commando, Let’s Go Command Line!”)
If you’re a geek, you love the command line. But that doesn’t mean you can’t also use Twitter.
Up until recently, the standard Twitter client for command line access has been TTYtter from Floodgap Software. Unfortunately, development was infrequent the past few years and has now officially stopped.
But oysttyer picked up where TTYtter left off: many of the commands are the same.
I used TTYtter occasionally on my Mac and needed to re-install after upgrading to the latest OS, so I took the opportunity to move to oysttyer.

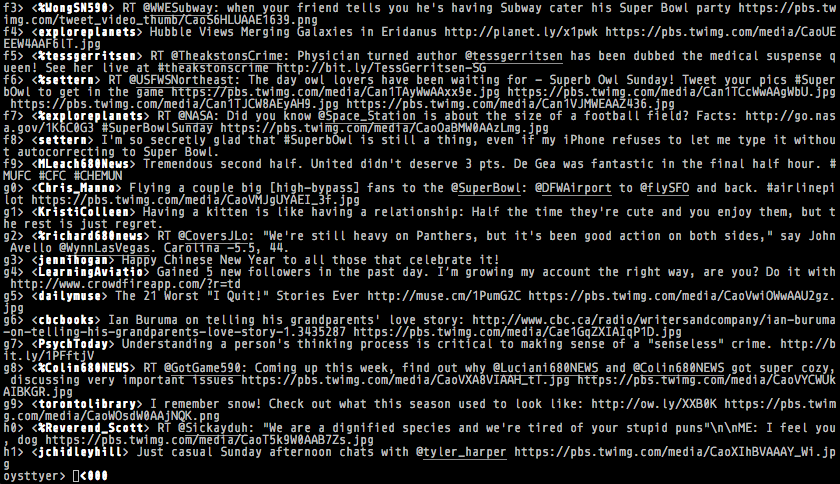
This screenshot is an example of what oysttyer looks like. Different types of Twitter messages (follows, mentions, direct messages, etc.) can appear in different colours but there are none in this case.
Installing oysttyer
A command line Twitter client is not for everyone but if you’re interested, here are the steps to install it on Mac or Linux:
-
Download and extract oysttyer. I used the master branch but you could probably use any of the other GitHub tags if you want a more stable/tested version.
-
Put the script in the
/opt/local/bindirectory. This is just a location that should not interfere with anything else and follows Unix standards. -
Run
sudo chmod 755 /opt/local/bin/oysttyer.plfor proper permissions. -
Download and extract the Term::ReadLine::TTYtter Perl module.
-
Install the Perl module:
perl Makefile.PL,make, andsudo make install. The computer may have more than one copy of Perl installed (i.e. OS and MacPorts) so note where the module was installed. -
Generate a Twitter API key for your copy of oysttyer. From the user guide:
- Log in to the Twitter Application Management page with your Twitter user name and password.
- Click Create New App.
- Fill out the new app form:
- Name – The globally unique name for your application. We suggest something like “oysttyer (YourCoolTwitterHandle)”
- Description – Please use “An interactive console text-based command-line Twitter client written in Perl”
- Website – Please use “http://oysttyer.github.io/”
- Callback URL – (leave blank)
- Check the box to agree to the developer agreement and click Create Your Twitter Application.
- Update your application to be able to send and receive direct messages.
- Click the Permissions tab.
- Select Read, Write and Access direct messages.
- Click Update application.
- Get your keys.
- Click the Key and Access Tokens tab.
- Note the Consumer Key (API Key) and Consumer Secret (API Secret).
-
Run the script using the Consumer Key and Secret you got:
/opt/local/bin/oysttyer -oauthkey=KEY -oauthsecret=SECRET. (Replace KEY and SECRET with the info that was generated in step 6.) -
Follow the on-screen instructions to grant access to your Twitter account.
-
Edit (or create) the configuration file:
nano ~/.oysttyerrc. Add the following lines, again substituting your Consumer Key and Secret from step 6:oauthkey=KEYoauthsecret=SECRET
-
Run oysttyer:
/opt/local/bin/oysttyer.plIt should load up and display your Twitter timeline!
You can see a list of available commands in the oysttyer User Guide. Many (all?) commands for TTYtter also work in oysttyer.
For reference, my .oysttyerrc file also includes:
- ssl=1
- verify=1
- dostream=1
- readline=""
- ansi=1
- vcheck=1
Each of these were carried over from TTYtter and are documented on the TTYtter Command Line Options page.
Thank You
Thanks to Cameron Kaiser at Floodgap Software for the original development of TTYtter, and the crew who took it over and continue building it as oysttyer!
